 Loading... Please wait...
- Home
- Activation Guide
Activation Guide
Welcome to the Activation Guide! Your success with Cryoguard™ indicators begins with the activation process. We are here to assist you. Watch the videos below and read the following directions for useful advice on activating and using the indicators. We recommend using protective eye wear and insulating gloves at all times when handling the indicators especially when they are frozen. If you have any further questions, please contact us.
Preparing the Indicator
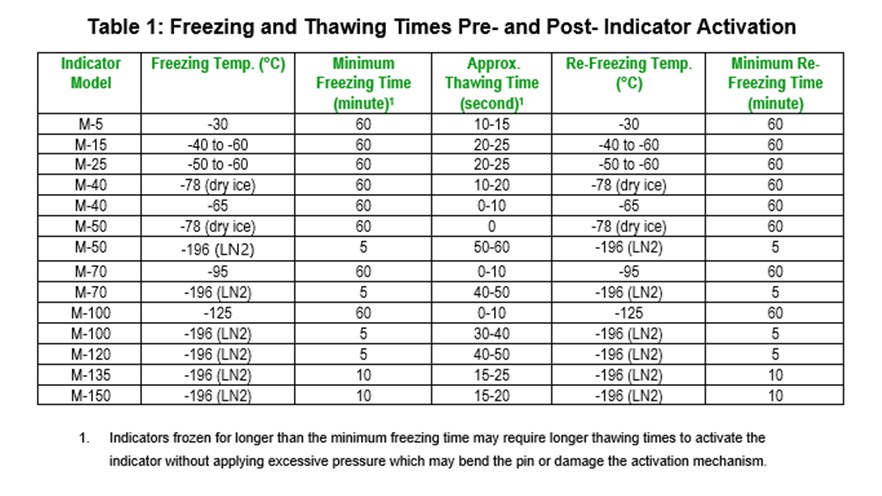
- Freeze the indicator for the minimum freezing time, depending on its type, prior to activation at the freezing temperature which is more than 25°C below the signal temperature (see Table 1 at the bottom of this page). This information is also found in the Package Insert. Activating incompletely frozen indicators can cause them to produce a false indication of thermal exposure during or shortly after activation.
- Just prior to activation remove the frozen indicator from the cold environment, place it in room temperature air and wait for a few seconds during the thawing time depending on the indicator (see Table 1 at the bottom of this page). We recommend placing the indicator in an activation tool or holding it with a gloved hand or pliers while you are waiting a few seconds. This softens the frozen indicator, making it easier to activate without causing it to give a false indication of thermal exposure upon activation or shortly after activation or damaging the indicator.
-
Use insulated gloves to handle frozen indicators. This prevents burns to your hand and minimizes thermal exposure of the indicator from the heat exchange of your hands to the indicator.
Depressing the Pin
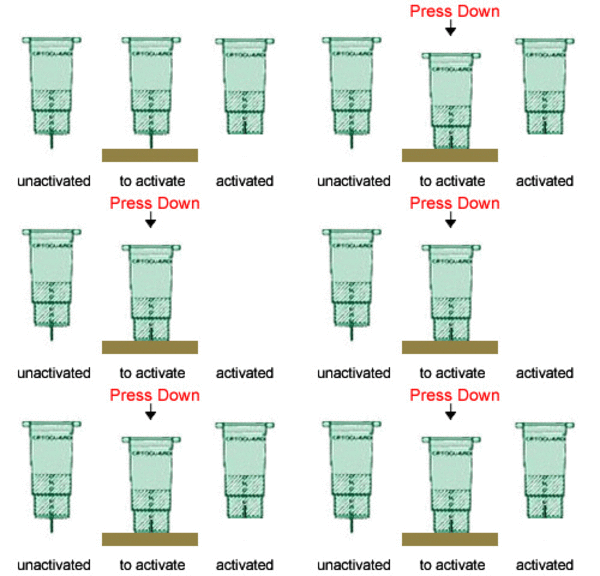
To activate the frozen indicator, the pin must be pushed slowly into the indicator until it is flush with the body. Choose from three methods of depressing the pin. We recommend using Method 1 to activate the indicator.
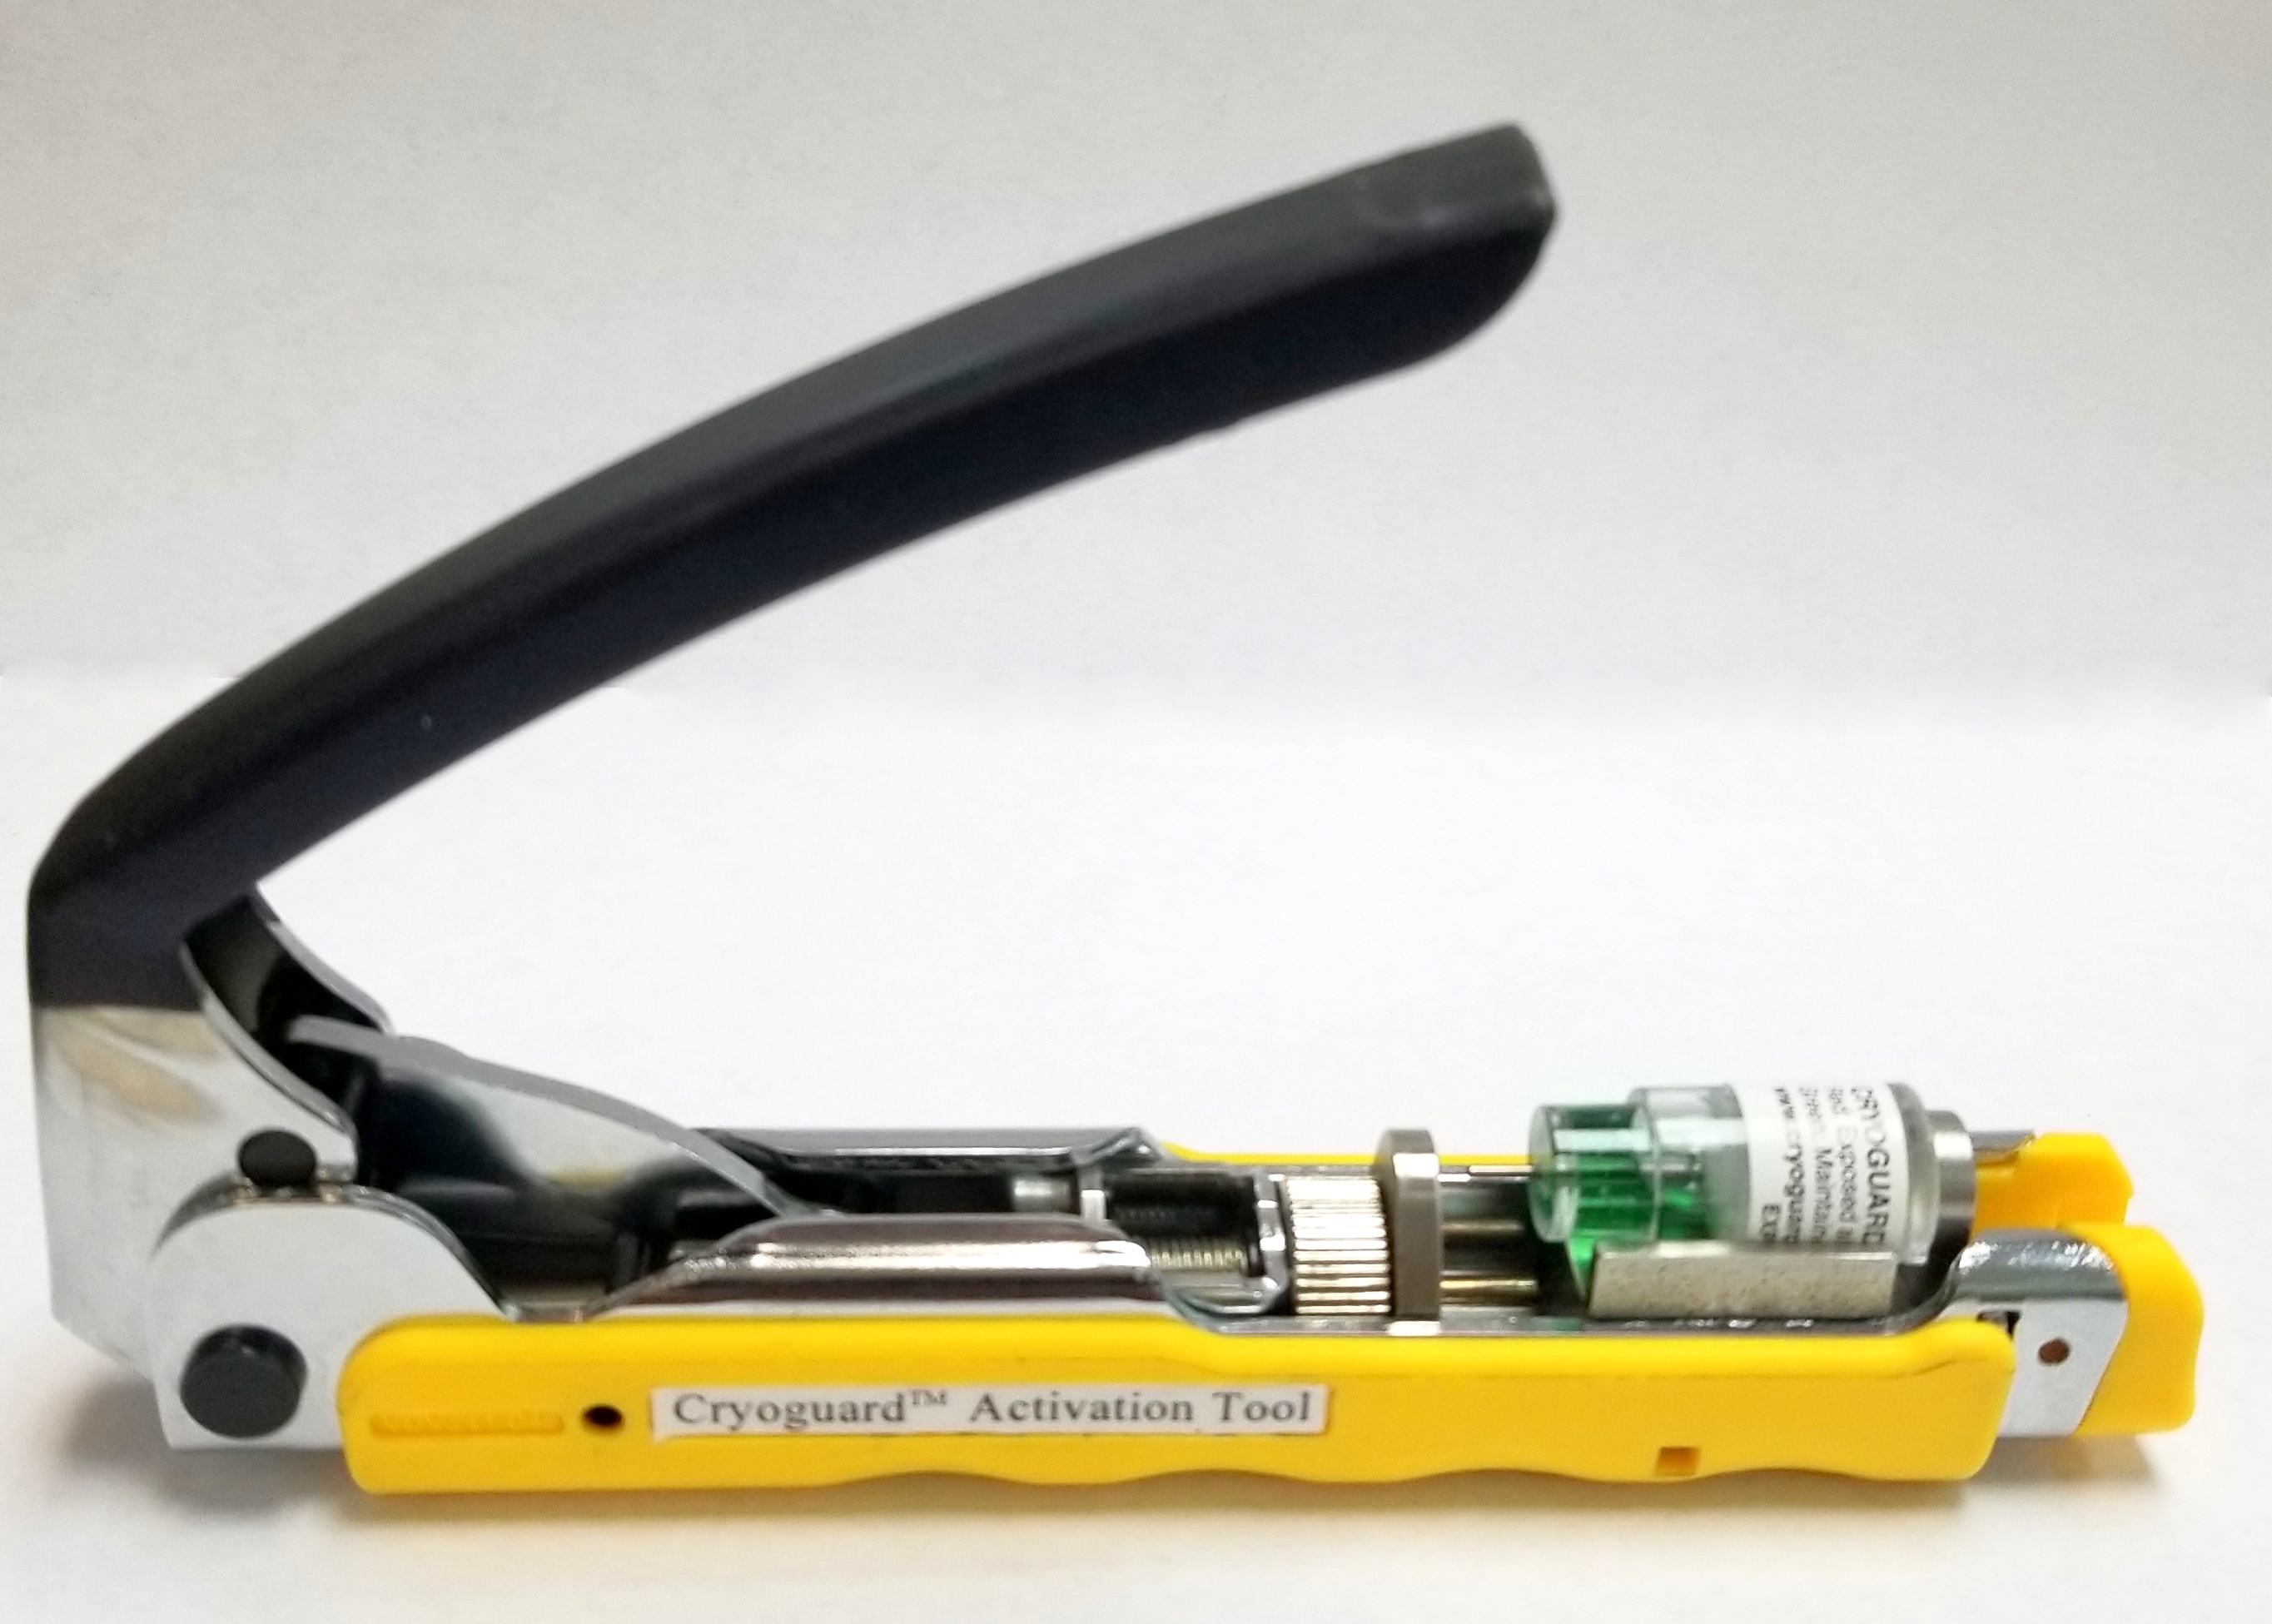
Method 1: Place the indicator in the activation tool. Slowly press the indicator pin into the frozen indicator using steady but gentle, constant pressure, after waiting the appropriate time, using our activation tool (required for M-135 and M-150 indicators). This method provides a convenient and rapid way of activating the indicator while preventing thermal exposure. If an activation tool is not available, then Method 2 or Method 3 can be used for all indicators except the M-135 and M-150. See Table 1 at the bottom of this page for freezing and thawing times.
For more information on how to activate an indicator on and off a freezer cane, please see the following link:
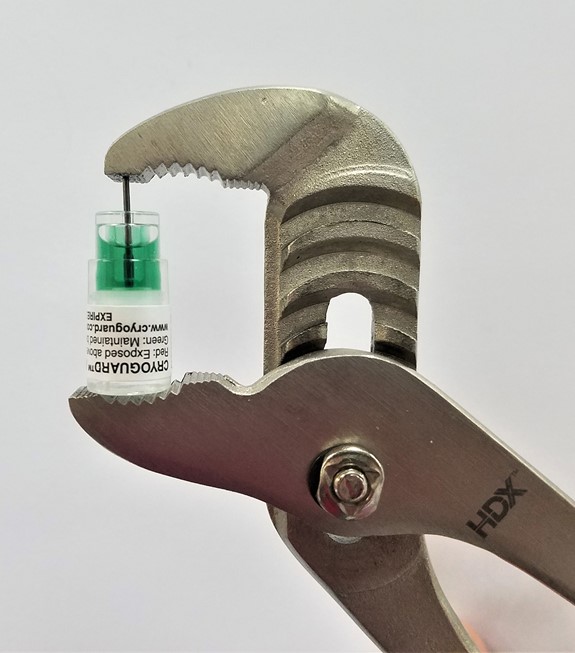
Method 2: Place the indicator in channel lock pliers so the indicator is on the outer edge of the pliers and will be pushed in straight. Slowly press the indicator pin into the frozen indicator using steady but gentle, constant pressure, after waiting the appropriate time. This method provides a convenient and rapid way of activating the indicator while preventing thermal exposure. See Table 1 at the bottom of this page for freezing and thawing times.
Method 3: Slowly press the indicator pin into the frozen indicator, after waiting the appropriate time, by pressing down on the indicator with a gloved hand on a hard surface such as steel or concrete. This method requires no tools but can easily produce a premature color change in the indicator. Do not use a hammer or a high impact device to drive the pin into the frozen indicator. This may damage the indicator and cause it not to be activated even though the pin is pressed flush with the body of the indicator, or damage the pin. See Table 1 at the bottom of this page for freezing and thawing times.
Handling the Activated Indicator
- Immediately after activation place the indicator back into the environment used to freeze the indicator for the minimum re-freezing time directed on the Package Insert or in Table 1 at the bottom of this page. The frozen environment should be at least 25° below the signal temperature of the indicators. This prevents thermal exposure of the indicator.
- Before placing the activated indicator into a shipping container, freezer box, or liquid nitrogen dewar, make sure the indicator is green. The green color signals that the indicator has been properly activated.
- When using dry shippers, make sure the dry shipper is at least 25° below the signal temperature of the indicator before placing a frozen indicator in the dry shipper. This prevents premature activation of the indicator while the shipper is cooling down.
- Indicators can be activated and stored in liquid nitrogen, liquid nitrogen vapor or in freezers for later use in shipping containers. This makes activated indicators immediately available for placement in shipping containers.
- Warning: Protective shielding including safety glasses and gloves should be used when handling indicators that have been submersed in liquid nitrogen to prevent injury in the unlikely event that the indicator shatters upon removal from the liquid nitrogen.
- Indicators, whether activated or not, should not be used after their expiration date. The action of expired indicators may be compromised.
